
Nodes
A Node is a server that carries your users' traffic. This page lists your nodes, adds new ones, installs the node program on them over SSH, and shows what each one is doing.
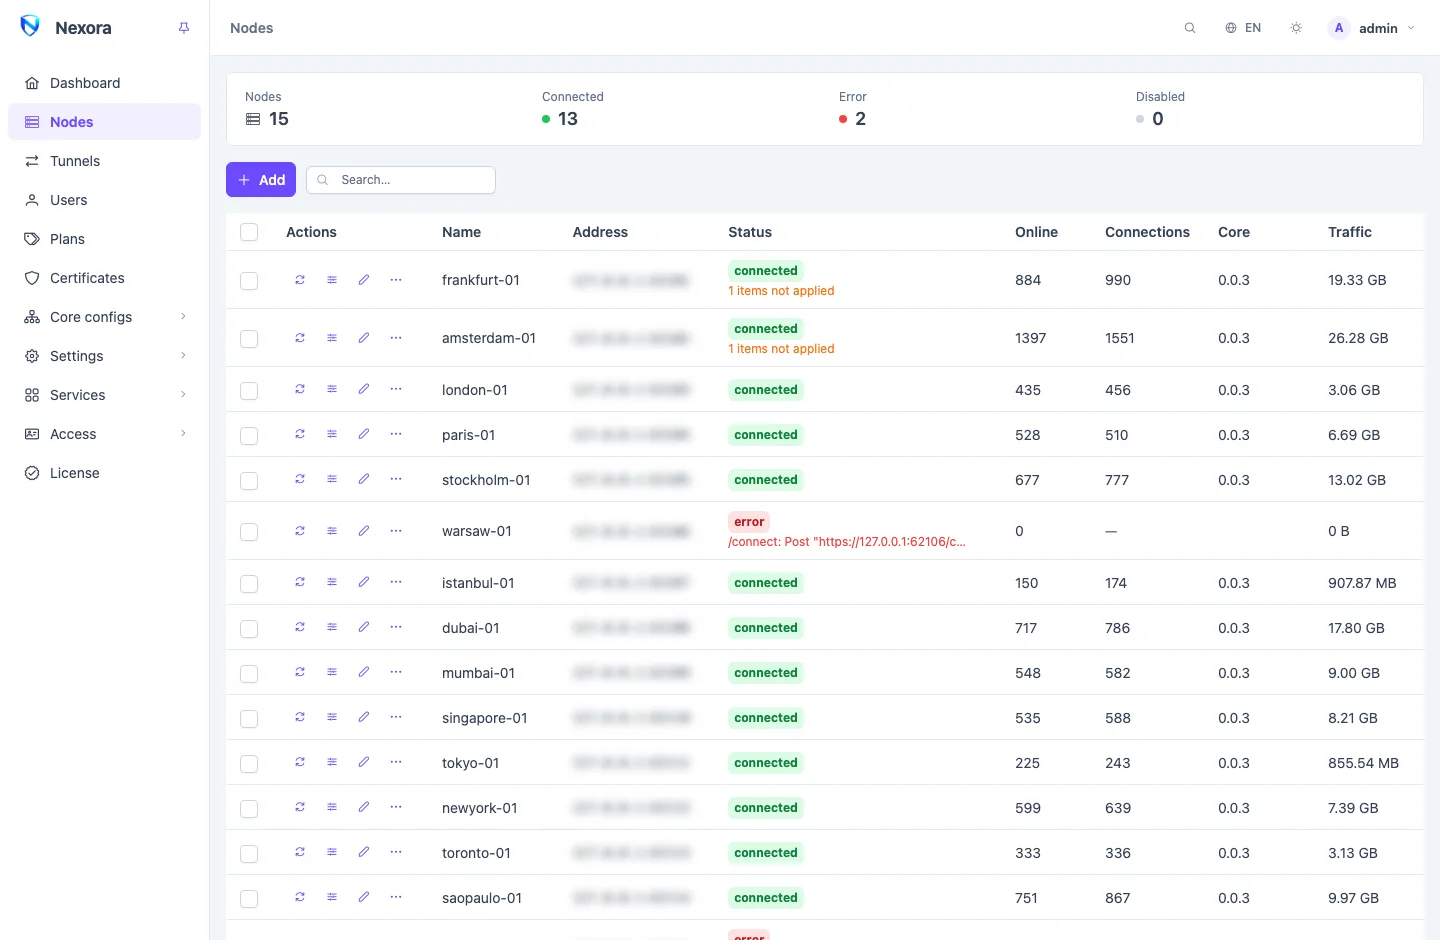
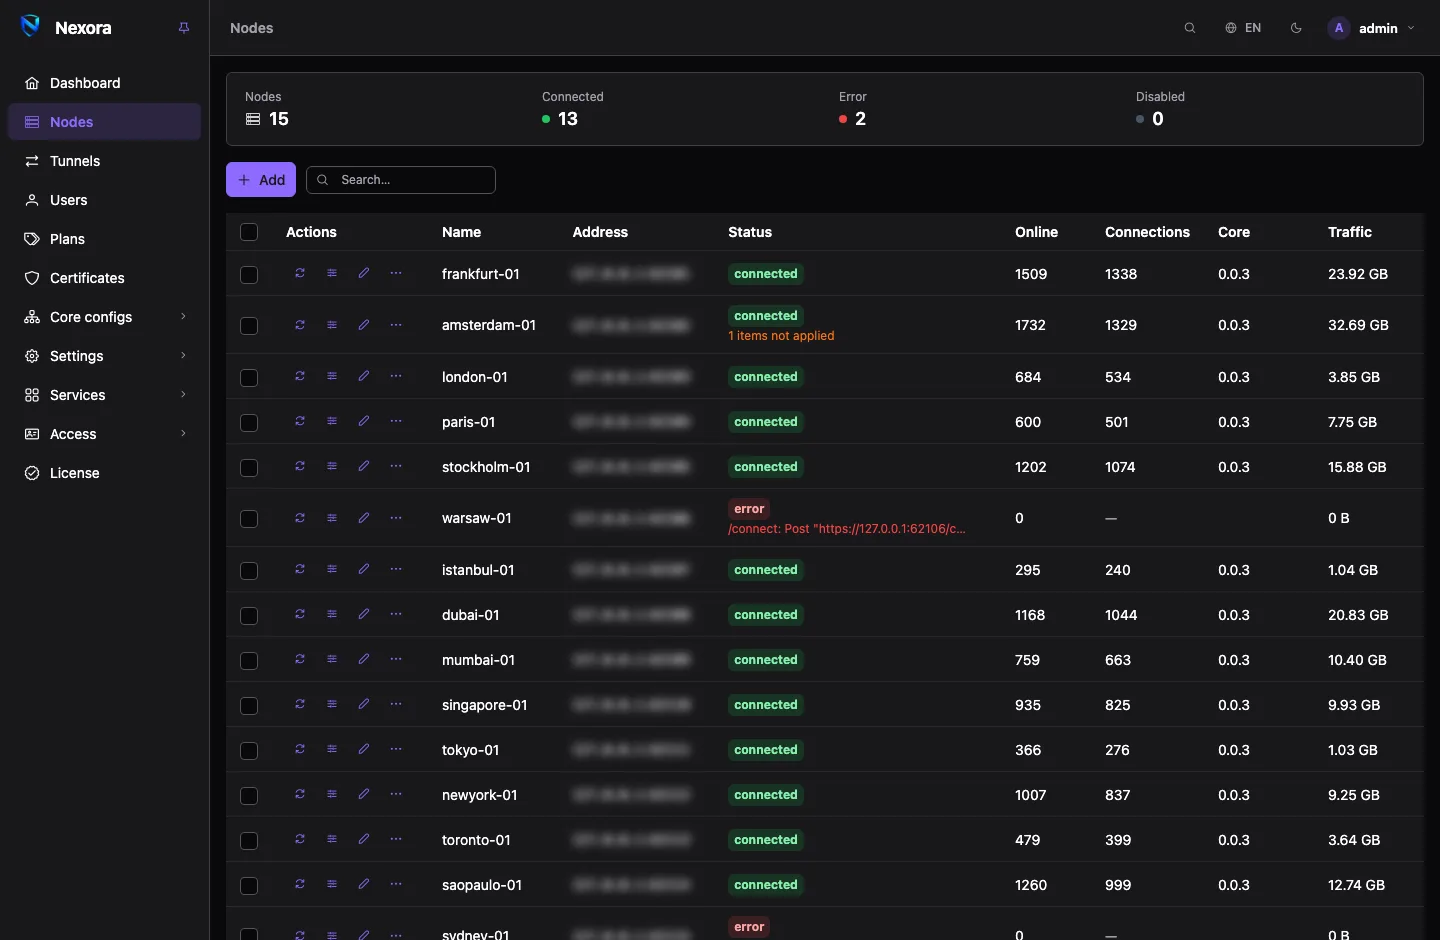
The list
| Column | Shows |
|---|---|
| Name | the node's name and remark. Two tags can appear beside it: Update {v} when a newer node release exists, and No template when the node serves nothing yet. |
| Address | where the panel reaches the node. Blurred until you point at it, so it does not show in a screenshot by accident. |
| Status | connected, connecting, error or disabled. An error's reason is under the tag. |
| Online | accounts with traffic on this node right now. — when usage graphs are off in General settings. |
| Connections | connections the node holds open, from its last report. An icon beside it marks engine restarts, or connections refused by a block outbound such as the torrent block; point at it for the detail. |
| Core | the node program's version |
| Traffic | all traffic since the node was added, its multiplier (×2) when it is not 1, and a bar for the periodic limit when one is set |
The summary strip counts nodes by state. Click a counter to show only those nodes.
Errors and warnings
A node can have two kinds of problem, and the list keeps them apart:
- An error (red, under the status) says why the node is not working: the panel cannot reach it, or the node refused its configuration. A node that refuses a new configuration keeps running the previous one, and the panel keeps trying to send it again.
- Warnings (amber, {n} items not applied) mean the node is serving, but some items are missing from what it runs: an inbound it skipped, an item the last sync could not apply, or users left out of an inbound because they lack the credential it needs. Point at the line to see the items. They stay until a sync applies them.
Adding a node
- Press Add.
- Fill in Name, and the Address and Port the panel reaches the node at. The port is the node's control port,
62050unless you chose another when installing. - Pick the node's Template. A node serves exactly what its template holds, and nothing until it has one.
- Fill in the rest of the form (below) as needed and press Save, or go straight on to install the node program.
Add a node goes through the same steps for a first node, and Panel and node on one server covers a node on the panel's own server.
The form
| Field | |
|---|---|
| Name | how the node is shown in the panel and, unless you rename entries, in users' links |
| Address, Port | where the panel reaches the node's control port. To move the node to another machine, use Move to another server instead of editing this. |
| Template (inbounds + outbounds + endpoints + routing) | what the node serves |
| Link addresses | the public addresses users' links name, when they differ from Address. See below. |
| Remark | a note shown under the name |
| Fallback certificate | used by this node's TLS inbounds that end up with no certificate of their own. See Certificates. |
| Traffic multiplier | users' traffic on this node is multiplied by this before it counts against their quota. 2 counts double, 0.5 half. |
| Periodic usage limit | caps the node's own traffic per week, month or year. See below. |
Link addresses
A link address is an address users' apps connect to. Leave the list empty and links use the node's Address. Add entries when users should reach the node at another address: a domain, a public IP when the panel uses a private one, or a second address that is filtered less.
- Each entry has an optional Label and an Address or domain.
- Every address adds a copy of each of the node's links to the subscription.
- The first address is the primary: endpoints, app configs and tunnels use it. Move entries with the arrows.
- Nothing is sent to the node: a change shows up on the users' next subscription fetch, with no sync.
Periodic usage limit
Pick Weekly, Monthly or Yearly, the Limit in GB, and when the period starts (Resets on a weekday, or a Day, and a Month for yearly). When the node's traffic in the period reaches the limit, the panel switches the node off and the list says Disabled by usage limit. It is switched on again at the start of the next period.
The limit counts the node's raw traffic: the multiplier is not applied. The bar under the Traffic cell shows how far into the limit the node is.
Installing the node program
Only the main admin can install. In the node's form, under Install, press Install: this saves the node first, then offers two ways.
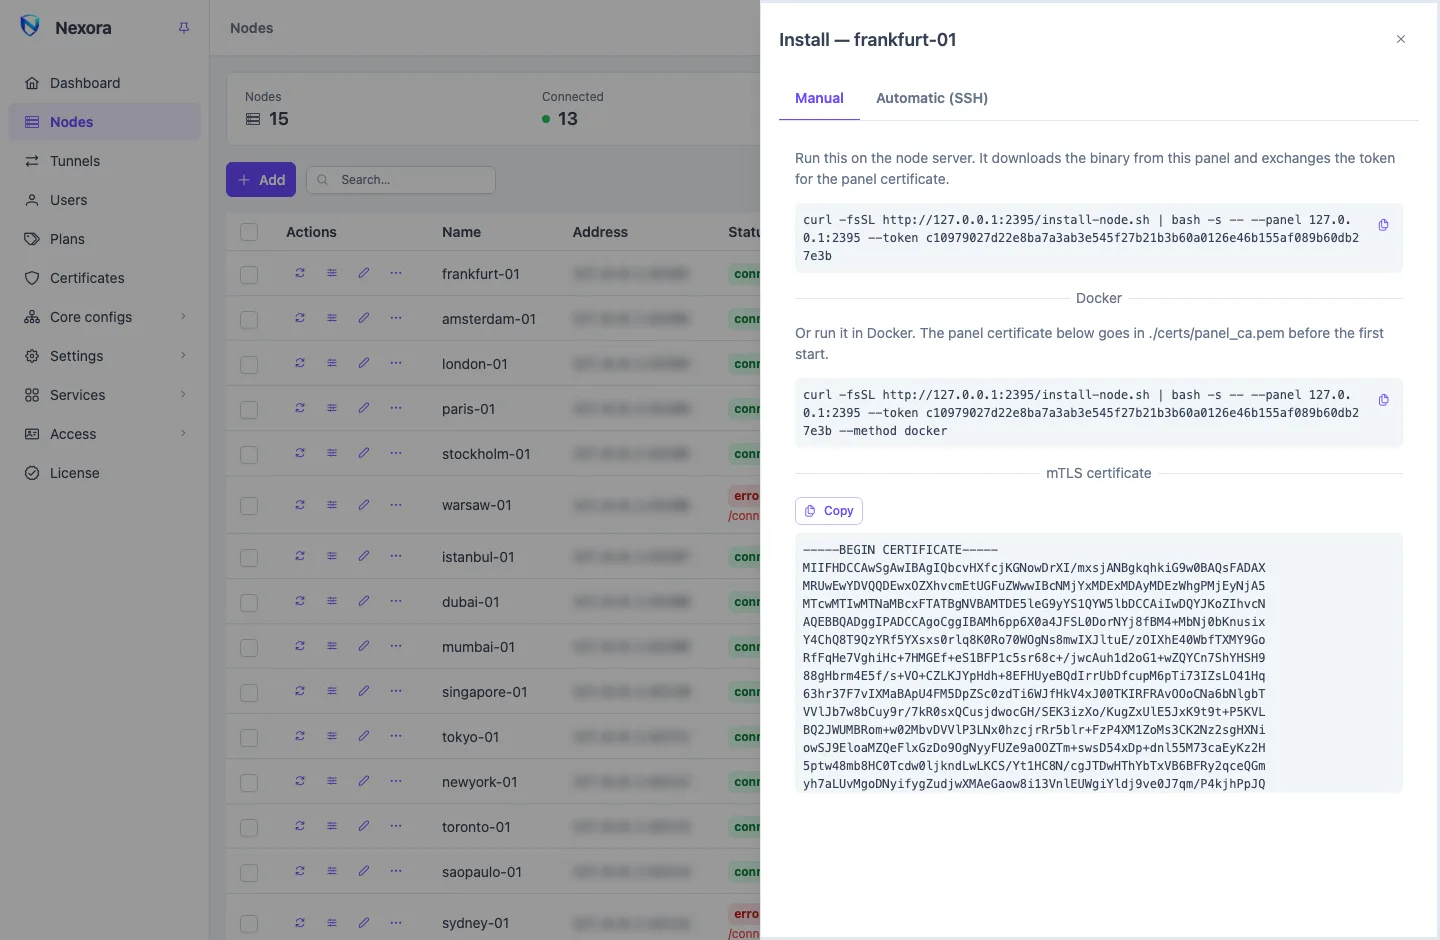
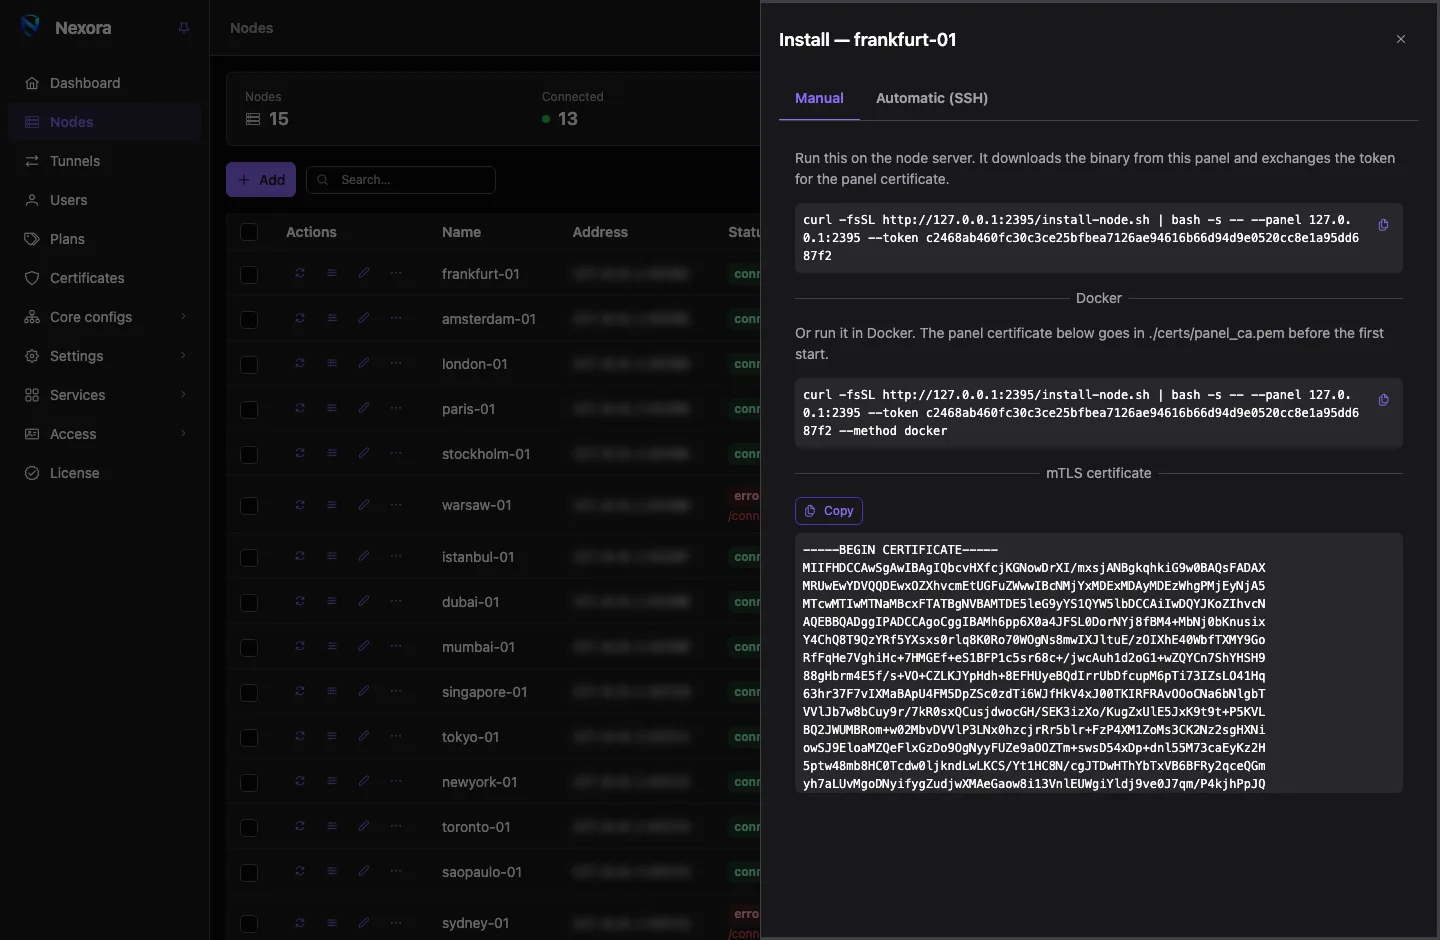
Manual: a command to run as root on the server. It downloads the node program from your panel and connects it to the panel. The second command does the same in Docker. Both carry the same one-time token, so run one of them, once; open the install section again for a fresh command.
Automatic (SSH): the panel logs in to the server and installs the node itself.
- Fill in SSH host (empty uses the node's address), SSH port, User and Authentication: a Password, a Private key, or the panel's own key once it is authorised there. A user other than root needs sudo.
- Press Detect. The panel looks at the server and shows what it found (Server): the host key, the architecture, what is installed now, and a Plan. Read any warnings it lists.
- Check the Deployment (Automatic, systemd (binary) or Docker), the Binary source and the Version.
- Press Install (or Update when the node is already there) and watch the Log.
Two options under the plan:
- Authorise the panel's key on this server lets later updates run with no password. You can take it back with Revoke panel key on the node's menu.
- Remember this server's SSH address stores the host, port and user on the node. Passwords and keys are never stored.
Remove from server uninstalls the node program from the server. The node's certificates stay, so a reinstall connects to the panel again without help.
A node and its panel explains what the install does, and the node's own install guide on GitHub covers every command-line option.
Updating nodes
When a newer node release is out, the list shows a banner with Update all nodes, and each node behind it carries Update {v}. Update all goes through the nodes one at a time over SSH. A node without the panel's authorised key is skipped: update it from its own Install dialog, or the Update to {v} entry on its menu. See Update.
A node's menu
Each row has three buttons, Sync, Config and Edit, and a ⋮ menu for the rest. Between them they offer:
| Entry | What it does |
|---|---|
| Sync | sends the node its configuration again |
| Edit | the node's form (above) |
| Config | the template, server details, extra outbounds and endpoints for this node only, and its own routing. See Routing and DNS. |
| Stats | the node's health history and per-user usage (below) |
| Live connections | who is connected right now (below) |
| Usage graph | the node's traffic over time |
| Logs | the node's log, live |
| Route test | which routing rule the node would apply to a connection you describe. See Routing and DNS. |
| Install, Update to {v} | the install dialog. Main admin only. |
| Certificate | a certificate that belongs to this node. See Certificates. |
| Enable / Disable | switches the node on or off (below) |
| Reconnect | drops the panel's connection to the node and opens a new one |
| Re-pin | forgets the node's pinned certificate, so the next connection trusts the one it presents. Use it after reinstalling a node from scratch on the same server. |
| Move to another server | main admin only (below) |
| Revoke panel key | removes the panel's SSH key from the server |
| Delete | below |
Watching a node
Stats: health history and uptime
Stats opens over a window you pick: an hour, a day, a week or 30 days.
- Host health draws the node's disk and memory use and its load over the window. The panel reads them every five minutes and keeps them for 90 days by default.
- Node availability is a bar under the chart: green where the node was Up, red where it was Not reporting, and grey for Not watched, when the panel itself was off or the node did not exist yet. The percentage counts only the time the panel was watching.
- Per-user usage on this node lists who used how much traffic on it in the window.
A node too old to report host figures shows no history. That is not an outage, and the bar does not paint it red.
Live connections
Live connections lists the connections open on the node right now, per user and inbound, and refreshes every ten seconds. Disconnect on a row closes that user's connections on that inbound. This is not a ban: the app reconnects on its next packet unless the user is disabled.
Logs
Logs streams the node's log while it is open (Live). Level changes how much the node logs. Clear empties the view.
Switching a node off
Disable on the menu switches a node off. The panel sends it an empty configuration, so it stops serving every user at once, and then stops contacting it. Its status reads disabled, and the actions that need the node (Sync, Live connections, Logs, Route test, Reconnect) are greyed out. Enable sends it its configuration again.
A node also stops serving by itself when it cannot reach its panel: after three minutes without contact it serves nothing until the panel is back. A node and its panel explains why.
Moving a node to another server
To replace the machine under a node, use Move to another server rather than editing the address. The node is pinned to its current server: its certificate, its SSH host key and the facts the panel learnt while installing it. Editing the address leaves all three pointing at the old machine, which is why the form warns when you change it.
- Open Move to another server on the node's menu.
- Enter the New address and Port, and the new SSH details if they differ.
- Press Move, then install the node on the new server.
The node keeps its name, template, link addresses and history.
Deleting a node
Delete removes the node and stops it serving. If the panel cannot reach the node at that moment, the node is deleted anyway and stops serving by itself three minutes after it last heard from the panel.
A deleted node is also removed from every tunnel it was in. A tunnel left with no relay or no origin is deleted with it.
Nodes beyond the licence
The free tier serves one node. A node beyond what your licence allows is marked Outside licence: it is listed and can be deleted, but it serves nothing and cannot be changed. See Licence.
Related pages
- Templates: what a node serves.
- Tunnels: carrying a node's traffic out through another node.
- A node and its panel and Changes without restarts: how a node is installed and kept in step.
- Dashboard: the fleet at a glance.